PHP Server Kit
First of all you must have an enviroment prepared to launch PHP applications. XAMPP is one of the most simple: install in few clicks and ready to use.
PHP Overview
Official PHP guide does not seem difficult. If you are already familiar with some other languages, learning basic PHP syntax won't take a much.
Setting up CodeIgniter
Download this PHP framework and copy its files into XAMPP server's htdocs folder like mentioned in manual.
Creating database
- Go to phpMyAdmin section of XAMPP main page (http://localhost)
- Authorize with login root. Password is absent by default.
- Create database named postengine
- Create table inside it named post and containing fields
- id(Integer, identity, autoincrement)
- header(varchar(255))
- content(varchar(30720))
- datecreated(datetime)
CodeIgniter configuration
Database connection
Go to [codeigniter/application/config/database.php] and assign following values to make database connection work:
$db['default']['hostname'] = 'localhost';
$db['default']['username'] = 'root';
$db['default']['password'] = '';
$db['default']['database'] = 'postengine';
URLs without index.php
This action is necessary for any project and CodeIgniter manual knows how to cope with it.
CodeIgniter: Model
Model must provide data access layer. In this case it is implemented as database repository. db object is responsible for database operations. Look at some basic actions with it:
<?php

class BlogModel extends CI_Model {
    function __construct()
    {
        parent::__construct();
        $this->load->database();
    }

    public function GetPosts() {
        return $this->db->get('post')->result();
    }

    public function AddPost($header, $content) {
        $record = array(
            'header' => $header,
            'content' => $content,
            'datecreated' => date('Y-m-d H:i:s')
        );
        $this->db->insert('post', $record);
    }

    public function RemovePost($postId) {
        $this->db->delete('post', array('id' => $postId));
    }
}
CodeIgniter: View
View is HTML template to be prepared and rendered with Model's data passed from Controller. For the sake of simplicity View's interaction with server is made by using POST forms:
<!DOCTYPE html>
<html>
<head>
    <title>Blog</title>
    <link rel="stylesheet"
          type="text/css"
          href="<?php echo base_url();?>application/views/style/style.css" />
</head>
<body>
    <div id="divNewPostFormContainer">
        <h3>New Post</h3>
        <form method="post">
            <input
                type="hidden"
                name="actionType"
                value="add" />
            <b>Header:</b>
            <input
                type="text"
                name="txtNewPostHeader"
                id="txtNewPostHeader"/>
            <b>Content:</b>
            <textarea
                name="txtNewPostContent"
                id="txtNewPostContent"
                rows="4"></textarea>
            <input
                type="submit"
                name="buttonAdd"
                value="Add Post" />
        </form>
    </div>
    <div id="divPostsListContainer">
        <?php foreach($posts as $key=>$value): ?>
            <div class="divSinglePostContainer">
                <form method="post">
                    <input
                        type="hidden"
                        name="actionType"
                        value="remove" />
                    <input
                        type="hidden"
                        name="postId"
                        value="<?php echo $value->id;?>"/>
                    Date created:
                    <span class="spanPostDateCreated">
                        <?= $value->datecreated ?>
                    </span>
                    <span class="spanPostHeader">
                        <?= $value->header ?>
                    </span>
                    <span class="spanPostContent">
                        <?= $value->content ?>
                    </span>
                    <input
                        type="submit"
                        name="buttonRemove"
                        value="Remove Post" />
                </form>
            </div>
        <?php endforeach; ?>
    </div>
</body>
</html>
CodeIgniter: Controller
Controller is responsible for processing GET and POST HTTP requests and provides View - Model interaction layer:
<?php
class Blog extends CI_Controller {

    function __construct() {
        parent::__construct();
        $this->load->helper('form');
        $this->load->helper('url');
    }

 public function index()
 {
        $this->load->model('blogModel', 'BlogModel'); //Load model first

        switch($this->input->post('actionType')) {
            case 'add':
            {
                $newPostHeader = $this->input->post('txtNewPostHeader');
                $newPostContent = $this->input->post('txtNewPostContent');
                if($newPostHeader && $newPostContent) {
                    $this->BlogModel->AddPost($newPostHeader, $newPostContent);
                }
                redirect('blog');
                break;
            }
            case 'remove':
            {
                $postId = $this->input->post('postId');
                $this->BlogModel->RemovePost($postId);
                redirect('blog');
                break;
            }
            default:
            {
                break;
            }
        }
        $data['posts'] = $this->BlogModel->GetPosts();
        $this->load->view('blogView', $data);
 }
}
?>
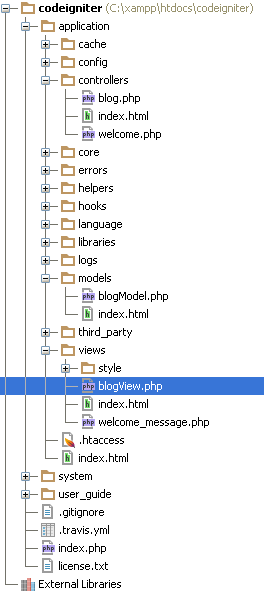
To sum up
That are all the things needed to write simple microblog PHP application. To sum up, solution itself and project tree are looking as follows:
 |
 |
Комментариев нет:
Отправить комментарий